HeadSite Tracker
Head Tracking Utility for macOS
Utilizing your computer's built-in camera, or other connected cameras, HeadSite Tracker detects your face orientation and transmits this information to games and other applications that support the OpenTrack UDP protocol. This means you get real-time, responsive control, adding a layer of realism and engagement to your gaming or application use.
HeadSite Tracker also works with the Apple Silicon Macs!
How to Use HeadSite Tracker: A Step-by-Step Guide
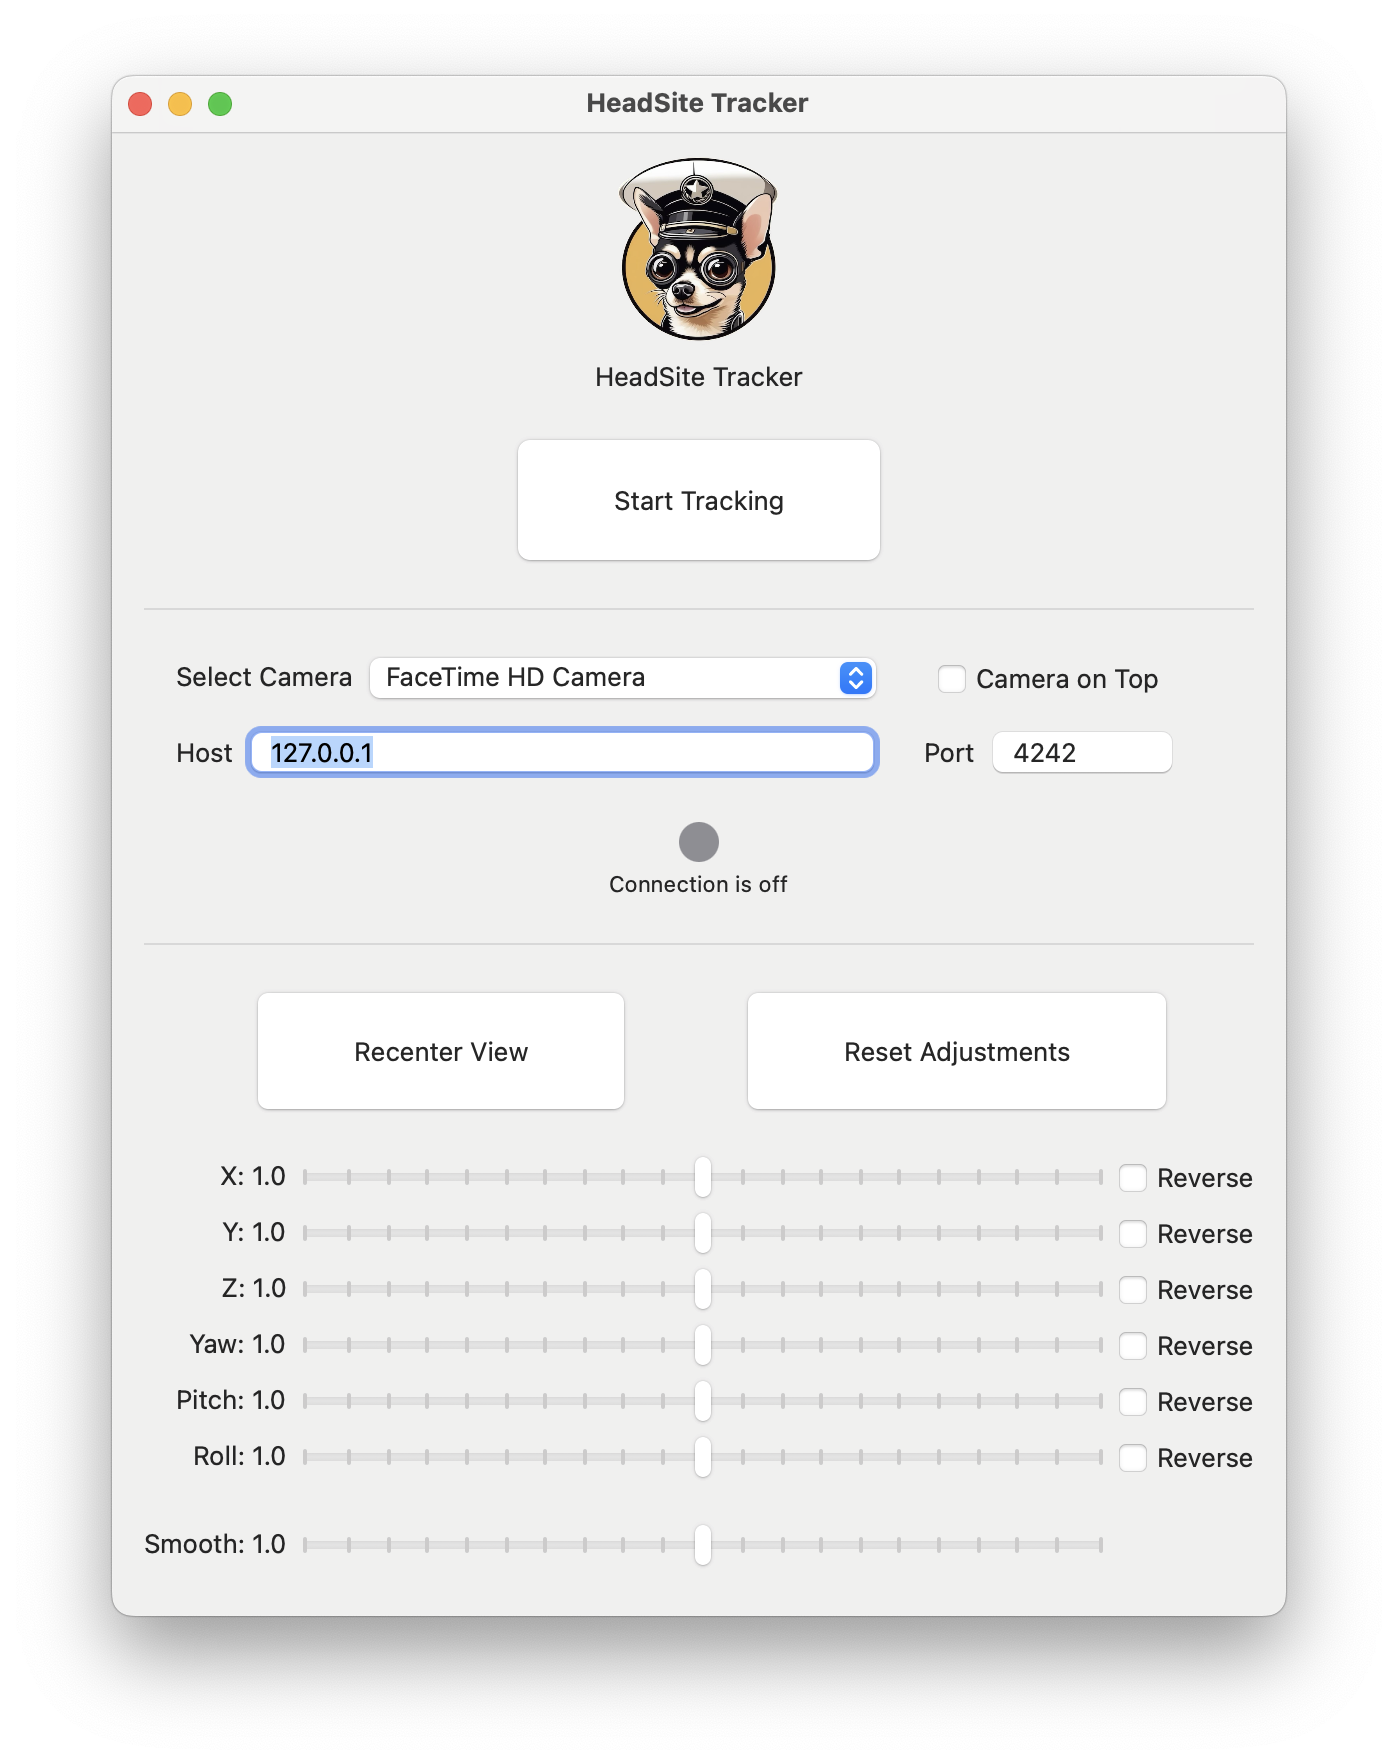
Step 1: Choose Your Tracking Camera
Navigate to the camera settings within the application.
Select the camera you'd like to use for tracking. HeadSite Tracker is compatible with your computer's built-in camera, external cameras, and even allows for remote access to your iPhone camera for versatile tracking options.
To keep the camera preview window visible on top of other windows, check the "Camera on Top" checkbox. This enables you to monitor the camera feed even while you're in-game.
Step 2: Configure Connection Settings
Input the host address and port details for the game or application you wish to connect to.
Tip: If you're running the game or application on the same computer, you can try to use 127.0.0.1 as the host address and 4242 as the port.
Step 3: Initiate Tracking
Ensure that the game or application you're connecting to is already running and ready to receive the tracking information.
Click on the "Start Tracking" button to establish the connection. If any issues arise, an error message will appear to help you troubleshoot.
Step 4: Recenter Your View
While the connection is active, you can adjust your head's initial position by clicking the "Recenter View" button. This sets your current position as the center for the sensor.
Tip: If you adjust the sensor sensitivity or reverse the input, it automatically recenters the view.
Step 5: Customize Sensitivity Settings
Adjust the tracking sensitivity by using the provided sliders. This allows you to fine-tune your experience.
To reverse the sensor direction, simply toggle the corresponding option.
You can also adjust the amount of smoothing applied by using the Smooth slider.
If you wish to revert to the original sensor settings, click on the "Reset Adjustments" button.
Step 6: Monitor Sensor Status
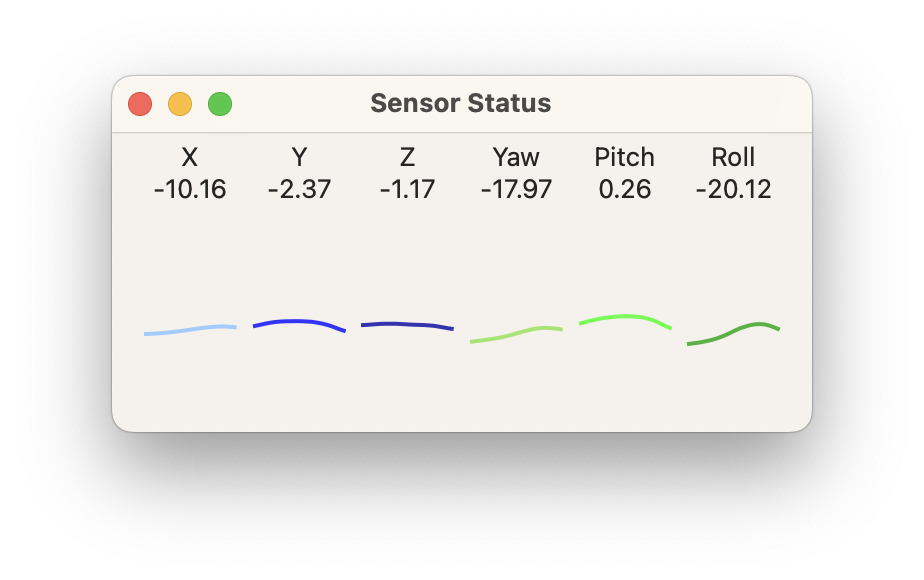
HeadSite Tracker offers a dedicated 'Sensor Status' window for more in-depth tracking insights.
To access this, simply navigate to the 'Window' menu and select 'Sensor Status'.
This new window displays both numeric values and a graph representing the current input detected by the sensor.
Additionally, any adjustments to the sensor sensitivity will reflect in this window, providing you with a visual guide to fine-tuning your experience.
By following these steps, you're well on your way to an interactive and immersive digital experience. Happy gaming!
Example Setup For X-Plane 12
Our favorite use for HeadSite Tracker is with the amazing X-Plane 12.
First, install the HeadTrack X-Plane plugin and make sure you enable it in the X-Plane context menu.
Second, start the HeadSite Tracker and configure it to connect to the correct host address. If you are using the same computer you can use the default 127.0.0.1 as the host address and 4242 as the port.
Tip: We have configured HeadTrack to an X-Plane keyboard shortcut so it is easy to toggle head tracking on or off.